[Note that if you are using the app from the website directly (not via Shopify), you can directly set the injection selector using Javascript, but by default the app would use the settings values]
Kiwi app relies on injection selector to decide where to display the sizing chart. To update this settings, please read through the following guide.
How to find injection selector using browser's inspector tool?
1. Go to settings, you would see the sizing injection selector option, like the following. The sizing selector tells Kiwi app where to display the sizing charts.
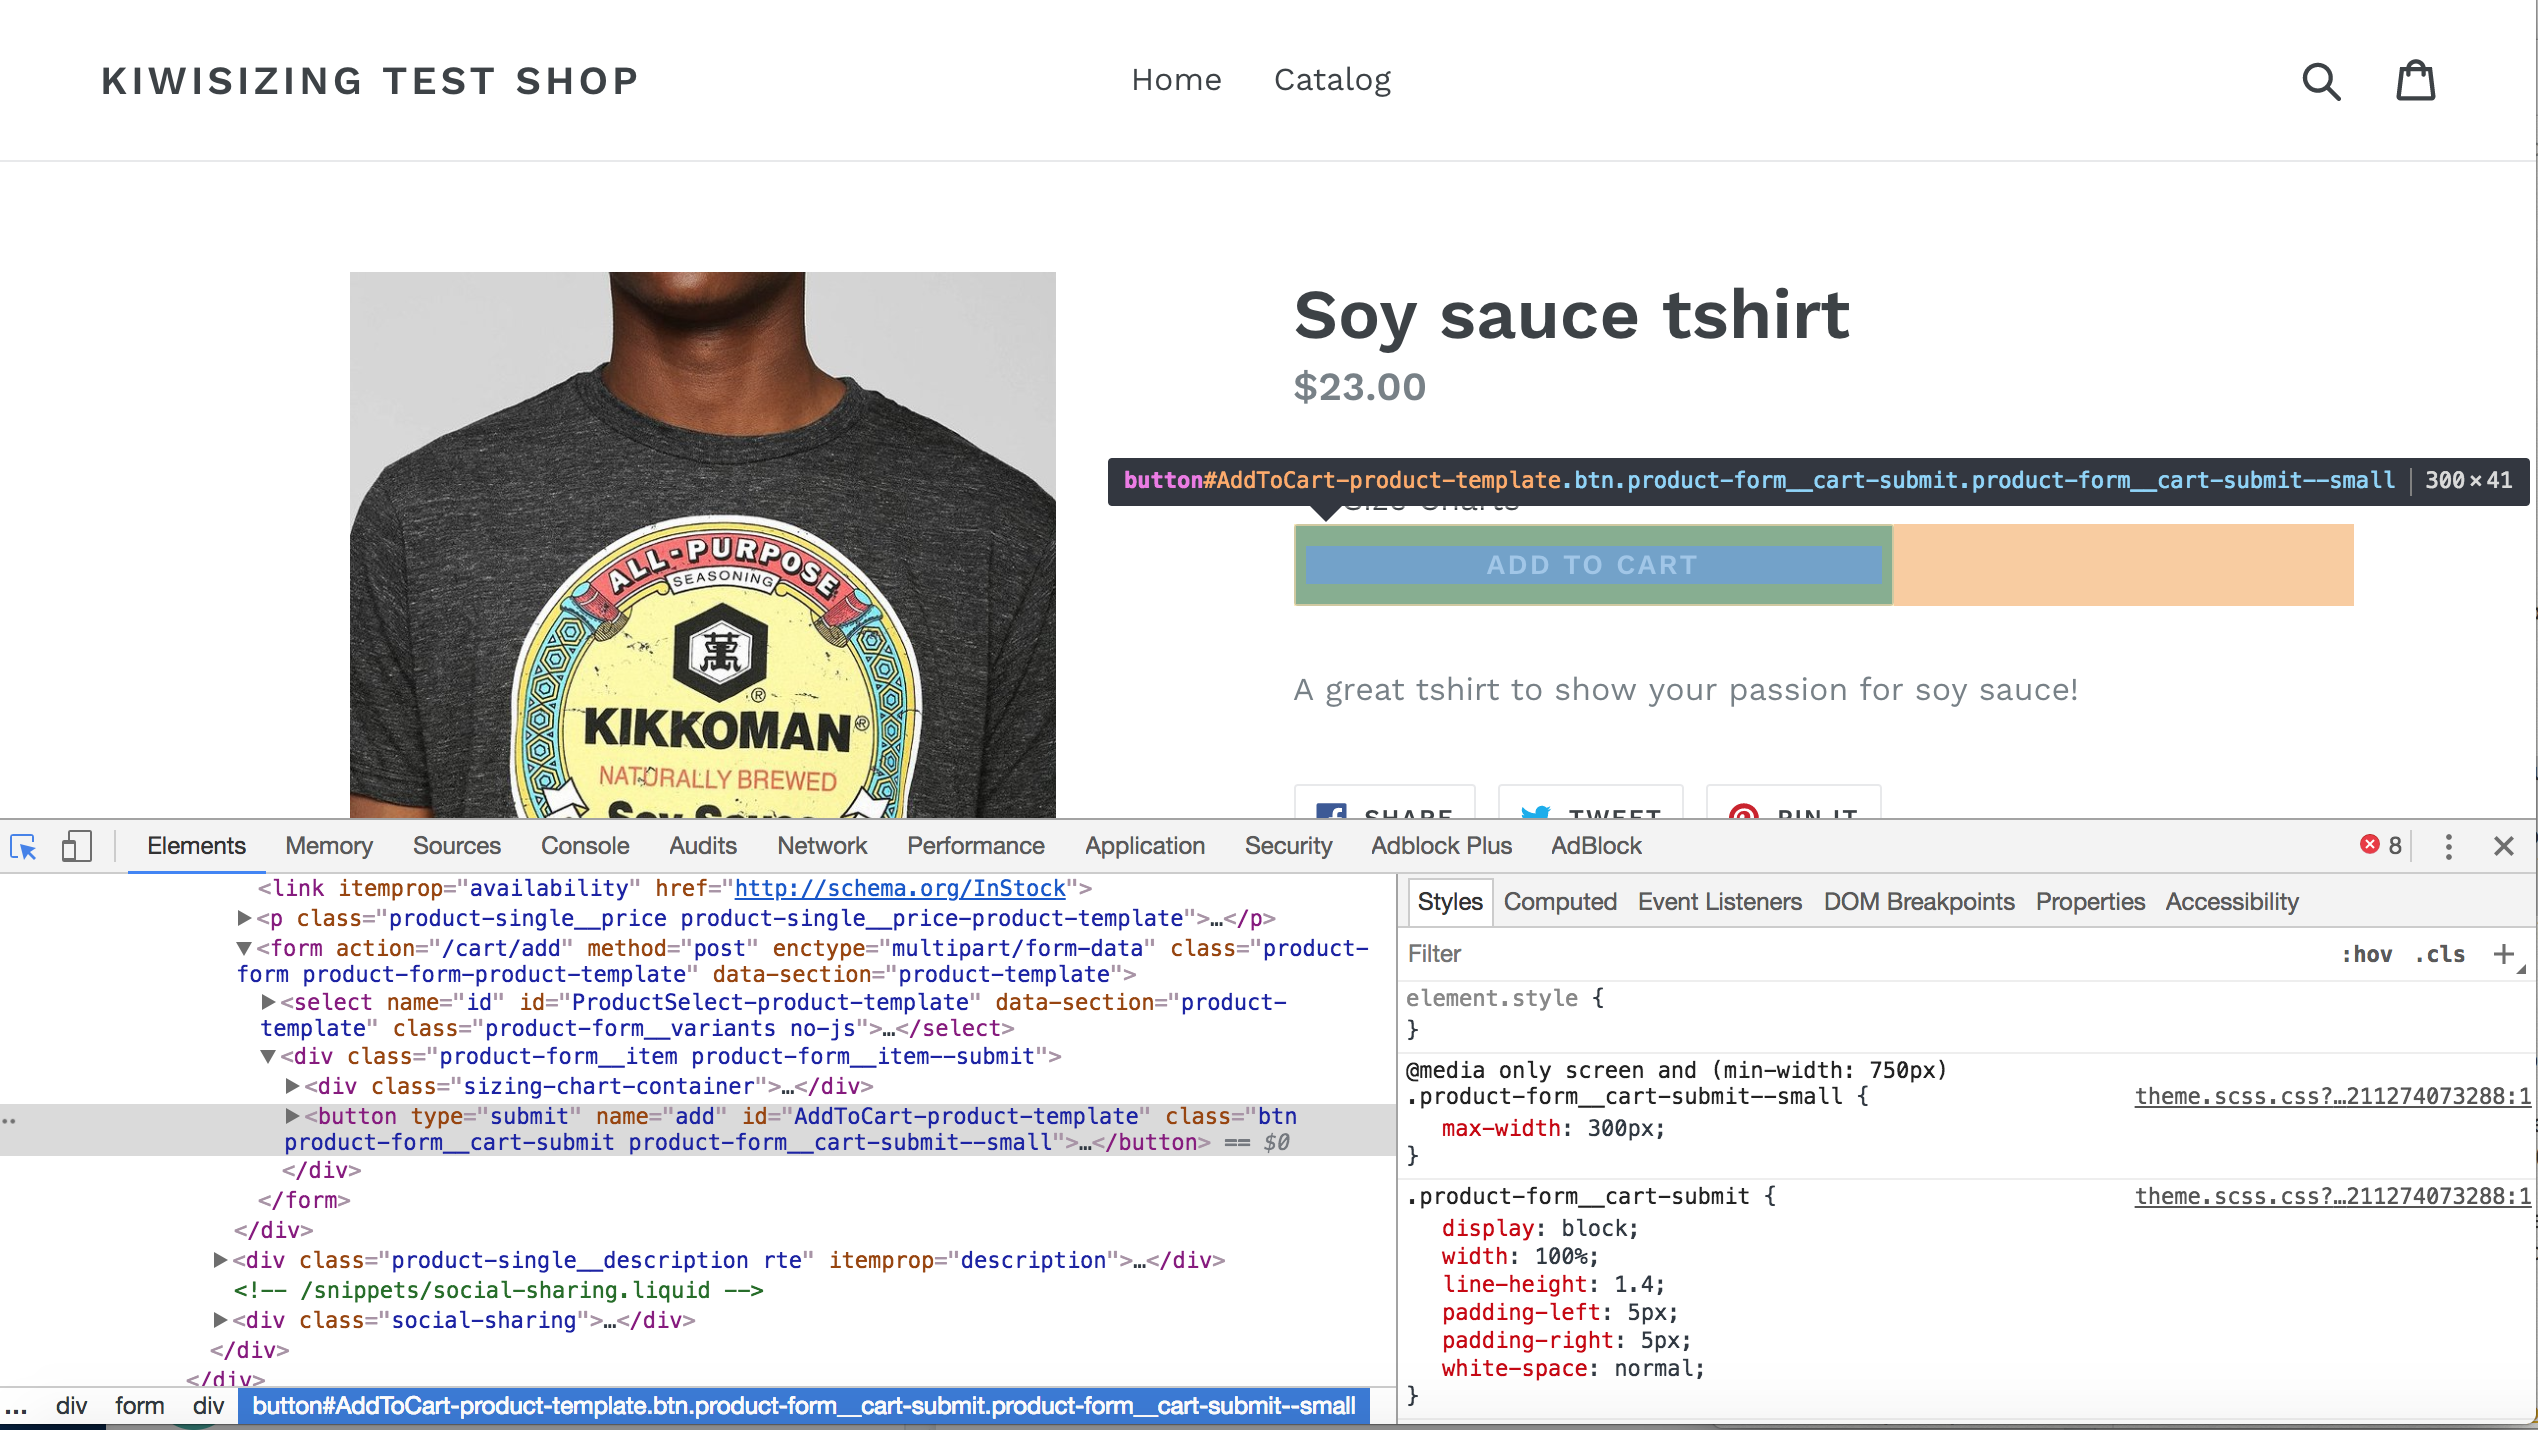
2. Now, what you need to find out is what ID or the class of the HTML element you want to display the sizing chart at. To do that, we'll need to inspect on the HTML of your product page. If you're using Chrome, right click on anywhere on your product page, and select "Inspect". Some window would pop-up. Now, click on the top-left corner of the window which looks like a pointer.

Once you clicked the pointer, you'll notice that when you hover on your product page, it starts selecting and showing the HTML element of the area your mouse is hovering at. Now, click on the element you wish the Kiwi code to inject at.
As shown in the screenshot above, you would see a line of HTML code being highlighted in the window. Copy either the ID (if it exist) or one of the special class names into the custom injector. In this example, I want to show the sizing chart above the "Add to cart" button, and the button HTML has an id of "AddToCart-product-template". So I would update my custom injector to this:
I want the size chart link to be side by side next to XXX?
By default the size chart links will take up its own row. You may need to add custom CSS in order to style it to fit side by side with another element on your theme.


Comments
0 comments
Please sign in to leave a comment.